基础岛04-InternLM微调实践
基础岛
L1G4- InternLM 论文分类微调实践(XTuner 版)
1 一些概念
什么是XTuner
- 是一个高效、灵活、全能的轻量化大模型微调工具库。
能解决什么问题
- 解决大模型微调的资源门槛高、效率低的问题
- 解决多种模型架构和微调方法的兼容性问题
- 解决从训练到部署的工作流程不连贯问题
适用场景
- 在计算资源有限的情况下微调大语言模型
- 多模态模型(如LLaVA)的预训练与微调
- 领域特定模型的定制化训练
- 大模型的Agent能力训练
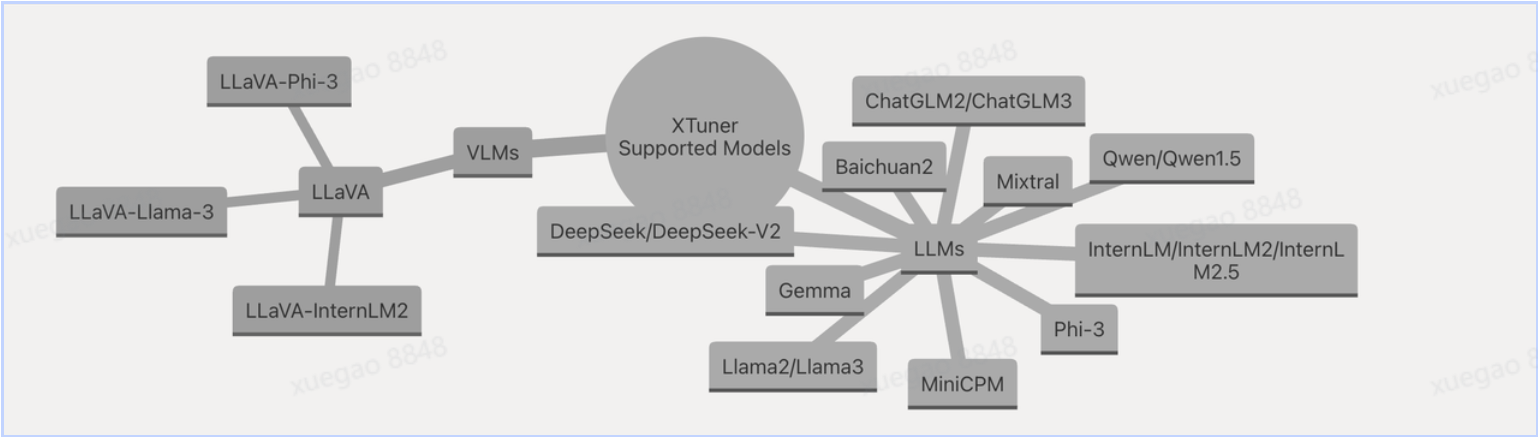
2 XTuner支持的模型
1 XTuner支持视觉语言模型(VLMs) 和 大语言模型(LLMs) 两大类别:
1. VLMs 分支(视觉语言模型)
- LLaVA:作为 VLMs 的核心代表,是基于基础模型扩展视觉能力的重要体系,衍生出多个适配版本:
LLaVA-Phi-3、LLaVA-Llama-3、LLaVA-InternLM2:分别适配Phi-3、Llama-3、InternLM2等基础 LLM,让这些文本模型具备多模态处理能力。
2. LLMs 分支(大语言模型)
覆盖 国内外主流开源 / 研究级大模型,是 XTuner 支持的纯文本模型底座,包含:
- 通用基础模型:
Llama2/Llama3(Meta 经典开源模型)、Phi-3(微软 / 斯坦福轻量级模型 )、Gemma(Google 开源模型 )等。 - 国内特色模型:
InternLM/InternLM2/InternLM2.5(字节跳动)、Qwen/Qwen1.5(阿里通义千问)、Baichuan2(百川智能)、MiniCPM(迷你通用模型 )等。 - 其他研究模型:
DeepSeek/DeepSeek-V2(深度求索)、Mixtral(多专家混合架构模型 )、ChatGLM2/ChatGLM3(清华智谱)等。
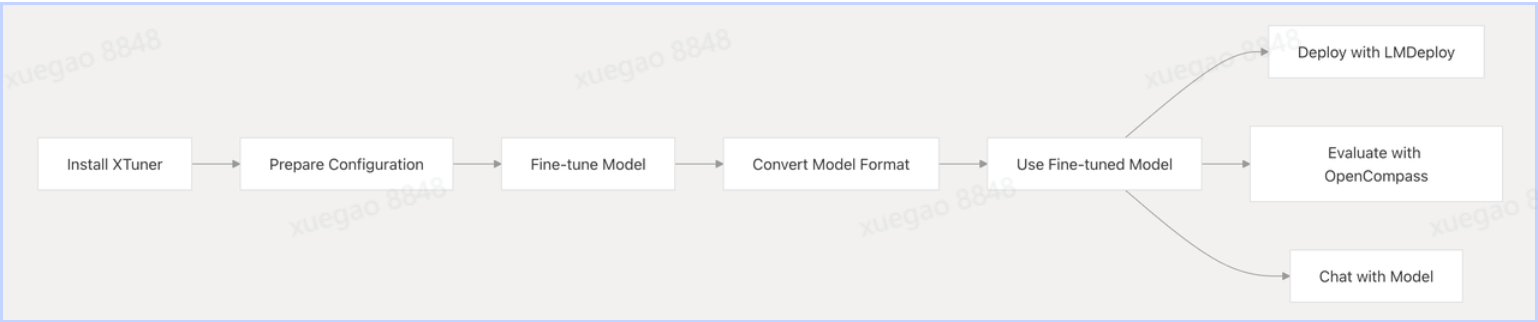
2 Workflow图
那么如何用 XTuner 改造大模型,有下面5个步骤:
(1)Install XTuner(安装 XTuner)
- 作用:XTuner 是专注大模型微调的工具框架,提供数据处理、训练流程、模型适配等能力。先安装它,才能开始后续 “定制化大模型” 工作。
- 类比:好比做木工前,先买 / 装好用的锯子、刨子(XTuner 就是 AI 模型微调的 “工具箱”)。
(2)Prepare Configuration(准备配置)
- 作用:定义微调任务的 “规则”,比如:
- 选哪种基础模型(如 Llama3、Qwen )?
- 用什么数据集(行业问答、多模态数据 )?
- 训练参数咋设置(学习率、batch size )?
- 关键文件:通常会写一个
.yml配置文件,描述以上细节,XTuner 会按这个 “剧本” 执行微调。
(3)Fine-tune Model(微调模型)
- 核心动作:基于配置,让基础大模型(如 Llama3 )“学习” 新数据,优化参数,适配特定任务(比如让通用模型变成 “法律咨询助手” )。
- 通俗理解:给大模型 “上补习班”,教它专属技能。
(4)Convert Model Format(转换模型格式)
- 必要性:不同部署 / 推理框架(如 TensorRT、ONNX )对模型格式要求不同,微调后的模型可能需要转成特定格式,才能被下游工具识别。
- 类比:手机充电线,有的设备要 Type-C,有的要 Lightning,转换格式就是 “换接口”,让模型能在目标环境跑起来。
(5)Use Fine-tuned Model(使用微调后的模型)
- 分支选择:微调后的模型有多种应用方向,流程在此拆分出 3 条典型路径:
Deploy with LMDeploy:用 LMDeploy(模型部署工具 )把模型 “上架” 到服务器 / 云端,对外提供 API 服务(比如做企业内部智能问答接口 )。Evaluate with OpenCompass:用 OpenCompass(大模型评测工具 )测试模型效果,看 “补习班” 效果咋样(准确率、鲁棒性是否达标 )。Chat with Model:直接和模型对话,验证功能(比如本地启动一个聊天窗口,测试微调后的回答是否符合预期 )。
总结来说:XTuner让整个流程产生价值与闭环,包括:
- 工具协同:XTuner(微调) + LMDeploy(部署) + OpenCompass(评测) 形成 “训练→上线→验收” 完整闭环,覆盖大模型定制化的核心环节。
- 灵活拓展:无论做科研评测(OpenCompass)、产品化部署(LMDeploy),还是快速验证(直接 Chat ),都能在流程中找到对应路径。
3 实战
1 环境安装
conda create -n xtuner_513 python=3.10 -y
conda activate xtuner_513
pip install torch==2.4.0+cu121 torchvision torchaudio --extra-index-url https://download.pytorch.org/whl/cu121

pip install flash_attn --use-pep517

(xtuner_74) root@intern-studio-50076254:~# pip show flash_attn
Name: flash_attn
Version: 2.8.0.post2
Summary: Flash Attention: Fast and Memory-Efficient Exact Attention
Home-page: https://github.com/Dao-AILab/flash-attention
Author: Tri Dao
Author-email: tri@tridao.me
License:
Location: /root/.conda/envs/xtuner_74/lib/python3.10/site-packages
Requires: einops, torch
Required-by:

pip install xtuner timm datasets==2.21.0 deepspeed==0.16.1

conda install mpi4py -y
#为了兼容模型,降级transformers版本
pip uninstall transformers -y
pip install transformers==4.48.0 --no-cache-dir -i https://pypi.tuna.tsinghua.edu.cn/simple
注意:上面的安装在执行微调时如果有问题可以参考下面重新安装
Build wheel 失败可以本地下载预编译版本,上传至开发机,安装。
Python = 3.10;torch = 2.4.0;cuda = 121
Github 地址:https://github.com/Dao-AILab/flash-attention/releases/tag/v2.6.3/flash_attn-2.6.3+cu118torch2.4cxx11abiFALSE-cp310-cp310-linux_x86_64.whl
检查安装状态:
xtuner list-cfgcopy模板文件到当今文件夹:
xtuner copy-cfg internlm2_5_chat_7b_qlora_alpaca_e3 ./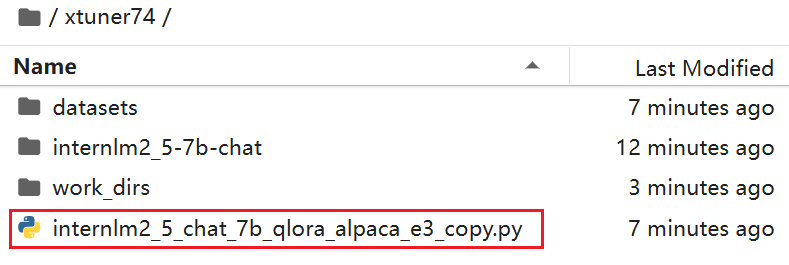
2 执行微调命令:
数据样式:
关于数据详情参考InternLM论文分类微调实践(swift 版)数据部分
原本的数据是swift版本,因此需要代码转化。这里直接贴现成的数据sftdata.jsonl给大家:
convert_to_alpaca.py(数据转化仅供参考)
{"instruction": "你是个优秀的论文分类师", "input": "Based on the title 'Outilex, plate-forme logicielle de traitement de textes \\'ecrits', authors 'Olivier Blanc (IGM-LabInfo), Matthieu Constant (IGM-LabInfo), Eric\n Laporte (IGM-LabInfo)', and abstract 'The Outilex software platform, which will be made available to research, development and industry, comprises software components implementing all the fundamental operations of written text processing: processing without lexicons, exploitation of lexicons and grammars, language resource management. All data are structured in XML formats, and also in more compact formats, either readable or binary, whenever necessary; the required format converters are included in the platform; the grammar formats allow for combining statistical approaches with resource-based approaches. Manually constructed lexicons for French and English, originating from the LADL, and of substantial coverage, will be distributed with the platform under LGPL-LR license.', please determine the scientific category of this paper. \n\nA. astro-ph\nB. cond-mat.mes-hall\nC. cond-mat.mtrl-sci\nD. cs.CL\nE. cs.CV\nF. cs.LG\nG. gr-qc\nH. hep-ph\nI. hep-th\nJ. quant-ph", "output": "D"}将模型和微调数据路径:
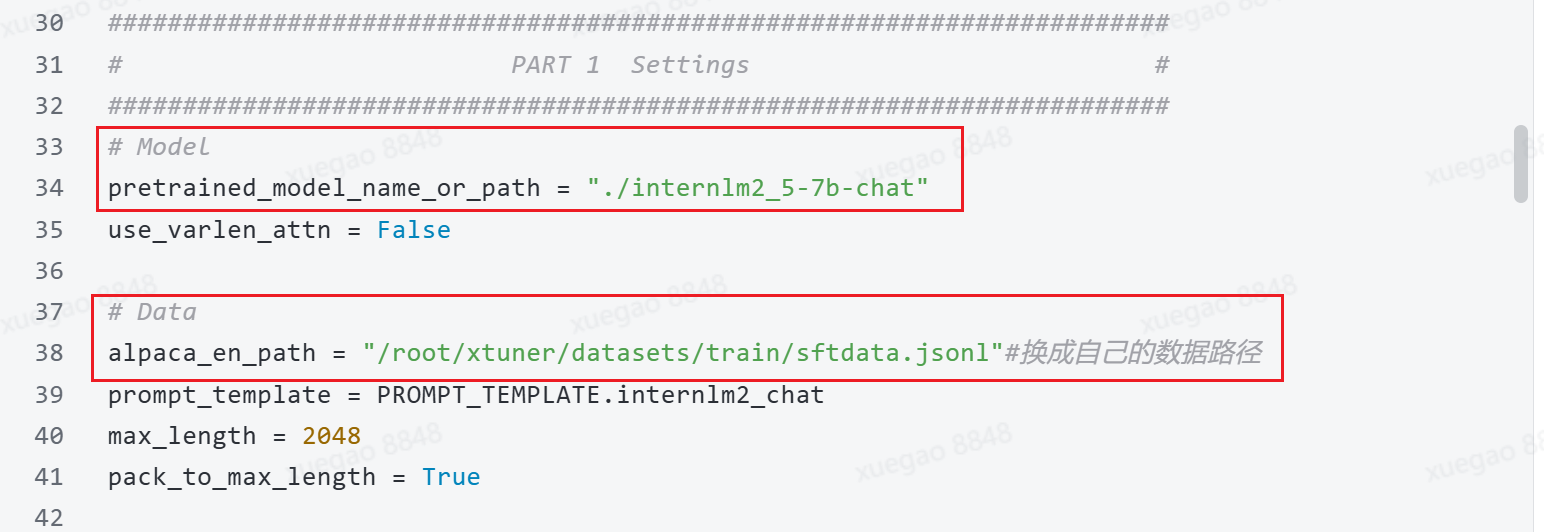
执行命令:
ln -s /root/share/new_models/Shanghai_AI_Laboratory/internlm2_5-7b-chat ./3 合并
在完成XTuner的微调后,需要进行两个步骤:首先将PTH格式的模型转换为HuggingFace格式,然后将adapter与基础模型合并。
3.1 将PTH格式转换为HuggingFace格式
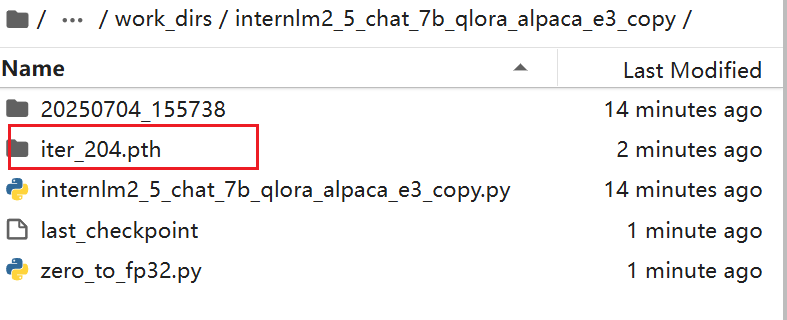
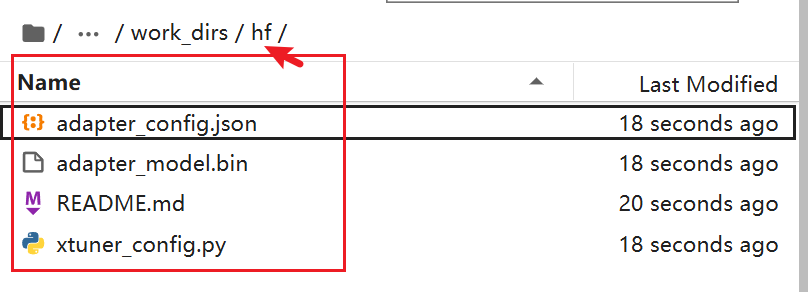
xtuner convert pth_to_hf internlm2_5_chat_7b_qlora_alpaca_e3_copy.py ./work_dirs/internlm2_5_chat_7b_qlora_alpaca_e3_copy/iter_204.pth ./work_dirs/hf执行后:
3.2 合并adapter和基础模型
xtuner convert merge \
    ./internlm2_5-7b-chat \
    ./work_dirs/hf \
    ./work_dirs/merged \
    --max-shard-size 2GB
执行后:
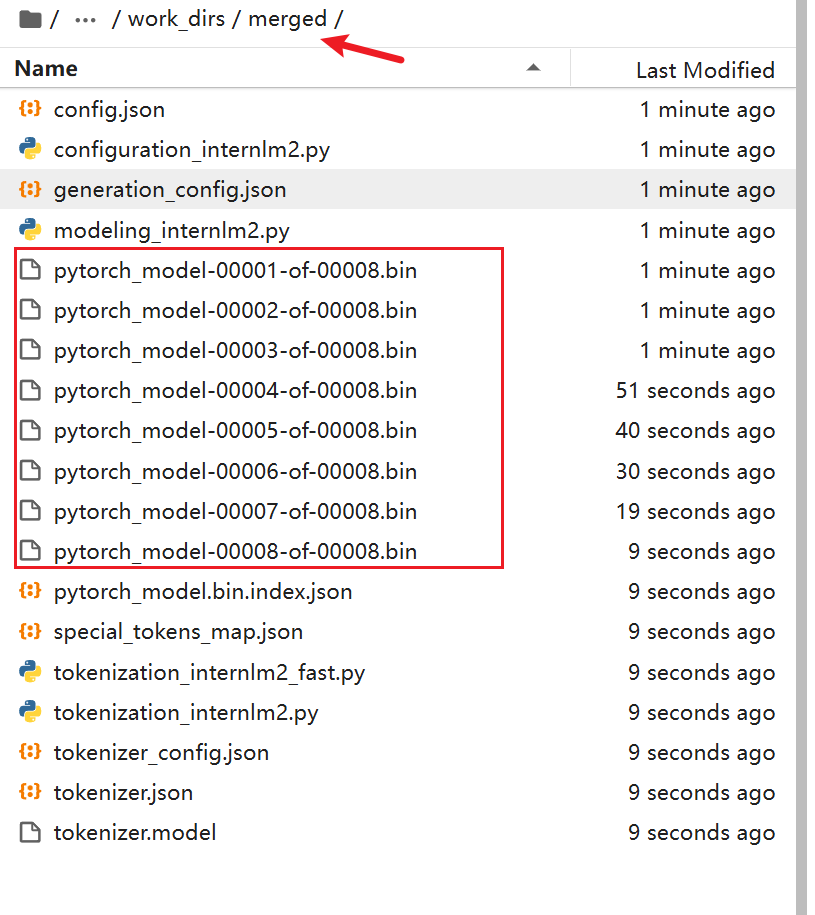
完成这两个步骤后,合并好的模型将保存在./lora_output/merged目录下,你可以直接使用这个模型进行推理了。
4 验证
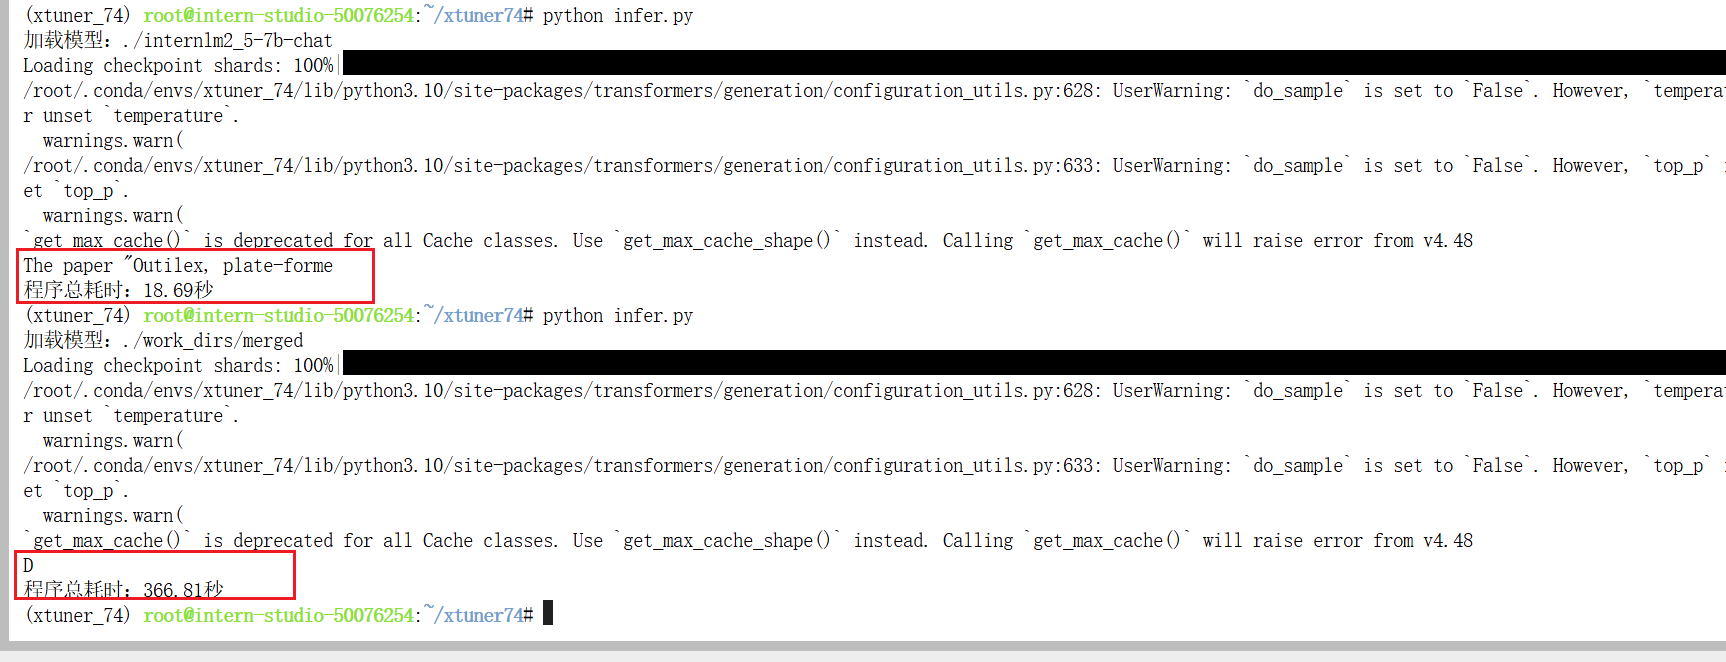
微调的模型可以选择,证明微调可用;
5 部署
pip install lmdeploy
python -m lmdeploy.pytorch.chat ./work_dirs/merged \
    --max_new_tokens 256 \
    --temperture 0.8 \
    --top_p 0.95 \
    --seed 0
4 评测
这个评测环节可跳,因为小伙伴在提交模型后,书生后台会自动评测。
觉得不放心的小伙伴,可以先自己评测一下看看效果。
具体可以看先前章节讲到的opencompass内容。
git clone https://github.moeyy.xyz/https://github.com/open-compass/opencompass opencompass
cd /root/opencompass
conda create -n opencompass python=3.10 -y
conda activate opencompass
pip install -e .

pip install sentencepiece
测评代码:
 # To run this example, you need to do the following steps:
# 1. Install latest opencompass
# 2. Start a local server with Qwen2.5-72B-Instruct as LLMJudge server (i.e. using vLLM or LMDeploy)
# 3. Change the judge_cfg openai_api_base to your corresponindg local server address
# 4. Start this evaluation by running 'opencompass eval_internlm3_math500_thinking.py'
# from opencompass.models import VLLMwithChatTemplate, OpenAISDK
from mmengine.config import read_base
from opencompass.models import HuggingFaceCausalLM

models = [
    dict(
        type=HuggingFaceCausalLM,
        path='/root/xtuner74/work_dirs/merged',
        tokenizer_path='/root/xtuner74/work_dirs/merged',
        tokenizer_kwargs=dict(padding_side='left', truncation_side='left'),
        model_kwargs=dict(device_map='auto'),
        max_seq_len=32768,
        max_out_len=16384,
        batch_size=4,
        run_cfg=dict(num_gpus=1),
    )
]

datasets = [
    {"path": "/root/xtuner74/datasets/train/newformat_sft_test_data.csv", "data_type": "mcq", "infer_method": "gen"},
]
运行测试:
cd /root/opencompass
#在opencompass目录下
python run.py /root/xtuner74/opentest.py --debug --trust_remote_code=True
报错的修改:
ValueError: The repository '/root/xtuner74/work_dirs/merged' contains custom code which must be executed to correctly load the model. # To run this example, you need to do the following steps:
# 1. Install latest opencompass
# 2. Start a local server with Qwen2.5-72B-Instruct as LLMJudge server (i.e. using vLLM or LMDeploy)
# 3. Change the judge_cfg openai_api_base to your corresponindg local server address
# 4. Start this evaluation by running 'opencompass eval_internlm3_math500_thinking.py'
# from opencompass.models import VLLMwithChatTemplate, OpenAISDK
from mmengine.config import read_base
from opencompass.models import HuggingFaceCausalLM
models = [
dict(
type=HuggingFaceCausalLM,
path='/root/xtuner74/work_dirs/merged',
tokenizer_path='/root/xtuner74/work_dirs/merged',
tokenizer_kwargs=dict(
padding_side='left',
truncation_side='left',
trust_remote_code=True, # ✅ 关键修改
),
model_kwargs=dict(
device_map='auto',
trust_remote_code=True, # ✅ 建议也加上,防止模型本身有自定义类
),
max_seq_len=32768,
max_out_len=16384,
batch_size=4,
run_cfg=dict(num_gpus=1),
)
]
datasets = [
{"path": "/root/xtuner74/datasets/train/newformat_sft_test_data.csv", "data_type": "mcq", "infer_method": "gen"},
]再报错:
AttributeError: 'DynamicCache' object has no attribute 'get_max_length'. Did you mean: 'get_seq_length'?修改:
/root/.cache/huggingface/modules/transformers_modules/merged/modeling_internlm2.py
✅ 搜索:
get_max_length
✅ 然后全部替换成:
get_seq_length再再报错:
    attn_weights = attn_weights + causal_mask
RuntimeError: The size of tensor a (401) must match the size of tensor b (400) at non-singleton dimension 3
修改:
你需要修改 modeling_internlm2.py 文件中相关位置(第 330~340 行附近),找到如下代码:

attn_weights = attn_weights + causal_mask
改成:
# pad causal_mask to match attn_weights if needed
if attn_weights.shape != causal_mask.shape:
    diff = attn_weights.shape[-1] - causal_mask.shape[-1]
    if diff > 0:
        causal_mask = F.pad(causal_mask, (0, diff))  # pad at the end
attn_weights = attn_weights + causal_mask
记得先 import torch.nn.functional as F,放在文件头部。
测试结果:

5 提交模型完成评测
将微调好的模型上传模型至 ModelScope 模型库 ,有 ① swift 指令 ② ModeScope 官方 Python SDK 两种方法,二选一即可。
接下来需要两个步骤:
到刚创建好的模型仓库中,拿到**
hub_model_id,实际上就是{账号名称/模型库名称},如“Shanghai_AI_Laboratory/internlm3-8b-instruct****”**账号设置-访问令牌 中拿到**
hub_token**,需妥善保存,不要暴露给他人
swift上传:
apt-get install git-lfs
git lfs install
swift export \
--model /root/paper/config/swift_output/InternLM3-8B-Lora-SFT/v3-20250510-231854/checkpoint-21-merged\
--push_to_hub true \
--hub_model_id 'zhangfc12345678/zfc-camp5' #替换成自己的 \
--hub_token '03fb4fxx' \ #替换成自己的
--use_hf falseModeScope上传:
from modelscope.hub.api import HubApi
from modelscope.hub.constants import Licenses, ModelVisibility

# 配置基本信息
YOUR_ACCESS_TOKEN = 'xxx(从modelscope获取,即上节的hub_token)'
api = HubApi()
api.login(YOUR_ACCESS_TOKEN)

# 取名字
owner_name = 'xxx'    # ModelScope 的用户名,需根据自己情况修改
model_name = 'xxx'    # 为模型库取个响亮优雅又好听的名字,需根据自己情况修改
model_id = f"{owner_name}/{model_name}"

# 创建模型库,若已通过6.1节的ModelScope网页端创建,此段代码可忽略
api.create_model(
     model_id,
     visibility=ModelVisibility.PUBLIC,
     license=Licenses.APACHE_V2,
     chinese_name=f"{owner_name}的论文分类打榜赛模型"
    )

# 上传模型
api.upload_folder(
    repo_id=f"{owner_name}/{model_name}",
    folder_path='/root/path/to/your/model',    # 微调后模型的文件夹名称
    commit_message='upload model folder to repo',    # 写点开心的上传信息
)
参考: